Posts

Showing posts with the label Tutorials

Mini Christmas crocheted stockings by Mandy - Free Pattern

Image
These cute little Christmas stockings were made by Mandy. There was no real pattern to follow so we worked it out easily enough by sharing crochet know how and made little stocking decorations until they were everywhere. Wil and Bev G made a heap! Here are some pictures and a pattern! A pentagon granny square folded in half to make a little stocking. Make them in whatever colour you like! Add some sparkle :) or a bell on the toe! Put a few sweets, a roll of mints or a roll of cold hard cash inside, hang them on the Christmas tree and you will be popular. Click "read more" below for the pattern.

The Best Ever Fried Rice Tutorial

Image
We love sharing the skills hidden within our group. Rita and her husband Arthur ran a Chinese Restaurant for years.... and so who better than Rita and her daughter, Christine to show us how to make the best fried rice ever? Here are some pics and the steps involved. At the end is Chris's proper version of the recipe (as opposed to my memories of it!)  Keep looking right until the last photo which is just the cutest photo of the mother/daughter team!                                      Rita & Chris got it all together to give us a great demo! Prepare everything beforehand and have ingredients ready in little bowls... (just like in the cooking shows!) * RICE - boil on the stove the night before. 1 cup of rice to 1 1/2 cups of water. Bring to the boil then turn down low and put the lid on for 20 minutes. Fluff the rice up and put in the fridge overnight. Let it dry out ...

Easy Bubble Crochet stitch - Tutorial

Image
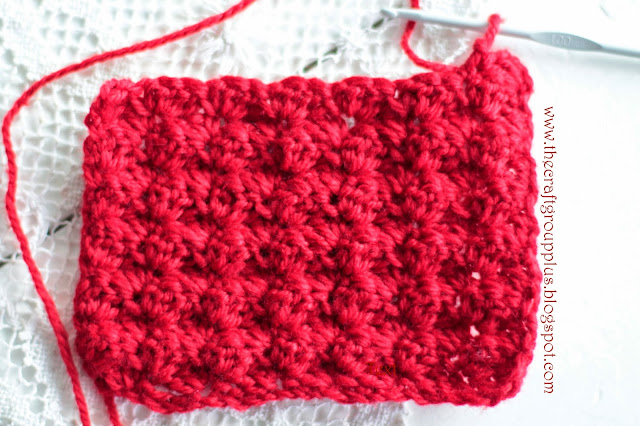
I recently learnt this crochet stitch and I want to share it with you! It is not a real bubble or bobble stitch where you have to do clusters and other such bulky things. This is all just chains, double crochet and treble stitches. It has a nice dense finish, making it a super warm stitch to use for a rug. But it is also a soft textured stitch making it ideal for a baby to lay on. It's lack of lacy holes means no little fingers or toes will get stuck in the rug.   I use UK patterns. If you read USA patterns: my double crochet = your single crochet, my treble = your double crochet. The stitch is very simply a Double crochet then 2 trebles all in the same hole. Easy! dc tr tr That was the super simple explanation. Now I will give step by step instructions because where that little hole is and how to turn to the next row are not always obvious. Start with making a small sample square because that is a great way to understand it. I am using a size 4 hoo...

Quick Recycled magazine Christmas Tree tutorial

Image
This Christmas I have been doing some decorating using recycled books , so to continue the theme, here is a great Christmas tree made from an old magazine. You may have seen it before but it's good to have a step by step 'how to' for yourself or the kids! I snapped Bronwyn making one so that we could share with you a full visual tutorial. Find a magazine that has a glued spine (not staples). "Perfect bound" is the proper name for this (because I just asked my magazine publishing husband!) Rip the covers off and fold the first top right hand corner down like this... Fold the diagonal edge to meet up with the spine of the magazine. You have to really score the folded edge well with your fingernail. Now make a straight fold along the pointy bit by folding a line along the bottom of the magazine. Open the page and fold the point under. Like this... Or, you can fold it under before opening the page. W...

A different twist on a friendship bracelet

Image
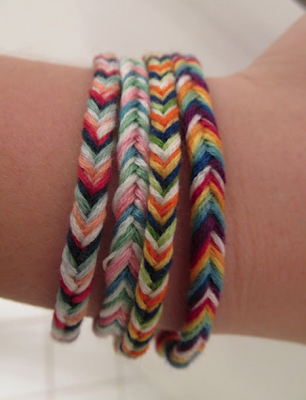
Inspire your teenage girls to try a new design for their friendship bracelets. I like the fishtail style shown here in a tutorial by "Carrots 'n spice". from carrots 'n spice Have fun!

Snowball Yarn bag by Lorraine

Image
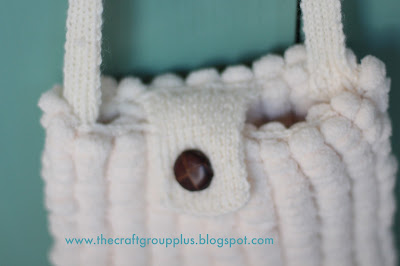
When the snowball yarn first came out everyone made scarves. But I think it is better suited for things like this cute bag made by Lorraine L. It uses 2 balls of snowball yarn and a bit of other yarn for the handle and little flap. The great thing is that I have the pattern for you! (Thanks for the tip Lorraine). Find the pattern here!  It's on the Lincraft website (together with heaps of other cool free patterns!) (I like Lorraine's better than the original! The Lincraft bag looks like it's a corn on the cob!)

Jennifer's quilt for Lydia's baby.

Image
Jennifer is a multi talented lady. She is also very generous with her skills! During Lydia's pregnancy she crocheted this beautiful baby blanket. And after the pregnancy Jennifer shared her skills as a Physician who used to specialise in lactation consultancy. Now that is a great friend to have when you have just had a baby! Do you love the zig-zag crochet pattern? Have you done it before? I must admit that Wendy T showed me once how to do this pattern. I completed about 30 cm of a rug and then came to a grinding halt. The problem was that I needed to count. Every up and down of the chevron pattern... I was counting. Counting and watching TV. Counting and chatting. I nearly went mad counting so decided it wasn't important enough to loose my sanity over. So I stopped counting. And I stopped crocheting my zig zags.  I know a truly talented crocheter can zig zag, count, watch TV, plan the week's shopping list and talk on the phone all at the same time but...

DIY wired jars

Image
I loved some jars in a trendy little gift shop in my neighbourhood.  The problem with me and gift shops is that I love the things I see but can't bring myself to paying the cash for anything. "I can make it" my heart tells me. "You don't have time" my head tells me. "You just watch me" my stubborn self tells me. And so I did. Like this... Materials needed:  Clean jars with labels removed Wire Wire cutters Pointy nose pliers 1. Bend one end of the uncut wire to form a little loop. 2. Bend the wire a quarter of the way around the top of the jar. 3. Make a complete loop on the wire using the pliers. 4. Bend the wire on the opposite side of the jar from the loop (three quarters of the way around from where you started.) Make another complete loop. 5.  Bend the wire back to the starting place. Extend the wire 1 cm past the starting loop (no more) and cut it with wire cutters. 6. Put...