Easy Bubble Crochet stitch - Tutorial
I recently learnt this crochet stitch and I want to share it with you!
It is not a real bubble or bobble stitch where you have to do clusters and other such bulky things. This is all just chains, double crochet and treble stitches. It has a nice dense finish, making it a super warm stitch to use for a rug. But it is also a soft textured stitch making it ideal for a baby to lay on. It's lack of lacy holes means no little fingers or toes will get stuck in the rug.
I use UK patterns. If you read USA patterns: my double crochet = your single crochet, my treble = your double crochet.


In each hole do a dc, tr, tr.
Repeat to the end of the row, finishing with a dc.

That's right, keep doing those dc, tr, tr.
(Or if you are using US terms, sc, dc, dc)

It is not a real bubble or bobble stitch where you have to do clusters and other such bulky things. This is all just chains, double crochet and treble stitches. It has a nice dense finish, making it a super warm stitch to use for a rug. But it is also a soft textured stitch making it ideal for a baby to lay on. It's lack of lacy holes means no little fingers or toes will get stuck in the rug.

I use UK patterns. If you read USA patterns: my double crochet = your single crochet, my treble = your double crochet.
The stitch is very simply a Double crochet then 2 trebles all in the same hole.
Easy!
dc tr tr

That was the super simple explanation.
Now I will give step by step instructions because where that little hole is and how to turn to the next row are not always obvious.
Start with making a small sample square because that is a great way to understand it. I am using a size 4 hook and 8 ply yarn.
Start by making a row of 22 chains.
The chain length must always be a multiple of 3 plus 1.
e.g. 7x3=21 +1 =22
Foundation row:
Chain 2 - that is your first double crochet.
Treble into the 3rd chain and then do another treble in the same hole.
Miss 2 chains then do another dc,tr,tr into the next chain.
Keep going like this to the end and you should finish with one dc.
Keep going (that's the hardest row done!)
At the end of the first row, do 2 chain then turn to go back the other way.
Do 2 trebles into the base of the 2 chain you just did.
In the next space above the dc in the row below, do a dc, tr, tr.
Look for the gap as shown below. Here I've already done 3 groups of dc, tr, tr and am about to put the hook into the next gap. This is important to get right to make it look like a bobble!
(See the diagonal piece of yard below the hook in this picture? The hole you are after is on the right of that yarn, not in the gap to the left of it.)

In each hole do a dc, tr, tr.
Repeat to the end of the row, finishing with a dc.

That's right, keep doing those dc, tr, tr.
(Or if you are using US terms, sc, dc, dc)

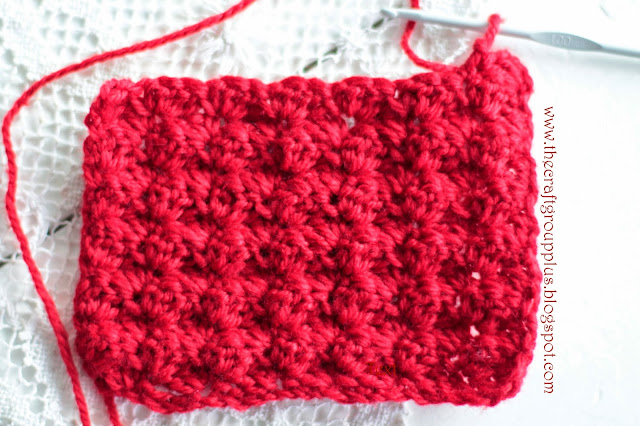
And that is it.
The most unprofessional crochet tutorial you have probably ever read.
I was shown this pattern and just wrote down my own instructions.
If you are game to try it, let me know if you understood it all.
It makes perfect sense to me! ;)
Comments
Post a Comment
I LOVE to have your comments and will try to answer questions as best I can.